Buying a home charger is the easy part. Getting the placement and power right is what determines daily convenience, charging speed, and long-term safety. Good planning balances your service panel’s capacity, the length and routing of a 240 volt circuit, and the way your car actually parks. It also accounts for cord reach, weather exposure, and ground fault protection in garages and outdoors. This article lays out an approach driven by constraints: start with the vehicle and the cord, then size the circuit to your driving habits and electrical system, and finally choose hardware that fits the environment and code. A little forethought beats a bigger breaker every time.
- Position the Charger Around the Car, Cord, and Parking Pattern
Begin with the car’s charge port location and the cable length of the wallbox you plan to use. Most EVs accept the SAE J1772 connector, while newer Teslas use NACS; adapters are common but add a little bulk at the handle. Stand where the car typically noses in or backs in and trace the cord path to the port. You want the connector to reach without crossing a doorway, draping across a workbench, or creating a trip hazard. In a garage for one car, that might mean mounting near the front left wall; in a driveway, it could mean a pedestal to avoid dragging a cable over gravel. If you are unsure how to balance reach, clearances, and listing requirements, licensed electricians who provide EV charging services from Sarkinen Electrical can evaluate the location and circuit in one visit.
- Right Size Charging Speed To Your Electrical Capacity
Level 1 charging on a standard 120 volt receptacle works for short commutes but is slow. Level 2 at 240 volts is the preferred option for many homes because it can refill a typical battery overnight. The circuit, not the box, determines speed: a breaker rated at 40 or 50 amps with appropriately sized copper conductors supports faster continuous charging than a circuit rated at 20 or 30 amps. Remember the continuous load rule, where chargers are usually set to 80 percent of breaker rating, and confirm the manufacturer’s maximum current setting. Before adding a circuit with a high current rating, have a load calculation performed on your service panel that includes large appliances like an electric range, dryer, heat pump, and water heater. If your calculated capacity is tight, two strategies help: choose a wallbox with adjustable current and consider an approved energy management system that automatically reduces charging current when household demand rises. Scheduling can also shift charging to periods with lower electricity rates.
- Receptacle or Hardwired: Choose the Connection Method
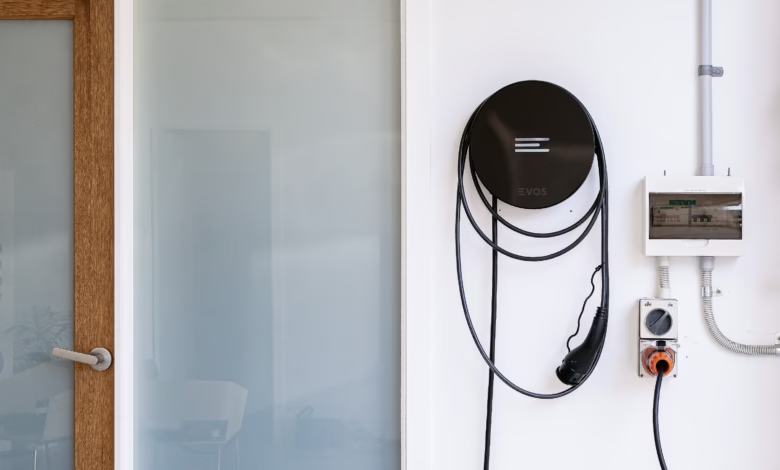
A NEMA 14- 50 or 6- 50 receptacle paired with a portable EVSE offers flexibility if you move or want to unplug the unit. A hardwired wallbox is cleaner and often recommended for higher current settings because it removes a receptacle contact that can loosen and generate heat under continuous load. If you use a receptacle, buy a listed model designed for heavy-duty applications, mount it with a solid backing, and torque the terminal screws to the manufacturer’s specifications. Plan a cord holster so the connector is stored off the floor and the cable does not rest under a tire. Many jurisdictions require GFCI protection for receptacles used for EV charging in garages or outdoors, generally provided by a compatible GFCI breaker. Hardwired charging equipment typically includes internal personnel protection and must be installed according to its listing and applicable code requirements.
- If It Lives Outdoors, Build For Weather and Clearance
Outdoor installations demand enclosures and methods rated for the elements. Look for a wallbox with a NEMA 3R or 4 rating for rain; in coastal areas, a 4X stainless or plastic housing resists corrosion. For receptacles, use a cover designed to protect the connection while the plug is inserted. Keep the connector off the ground with a holster and form a drip loop in the cable before it enters the enclosure to shed water. Conduit should be PVC resistant to UV exposure or metallic tubing suitable for exterior use, with expansion fittings across long runs that cross walls exposed to sunlight. If you are feeding a detached garage, plan the trench route, call utility locating services before digging, and choose conductors rated for wet locations, such as THWN in conduit. Maintain working clearances around the equipment so doors, trash bins, and lawn tools do not crowd the cord or handle.
- Use Smart Load Management Before You Upgrade the Panel
Smart chargers with WiFi or Ethernet let you set maximum current, schedule charging to match rates that vary by time of use, and monitor energy through a mobile app. Some add current transformer sensors that watch the total household load and automatically reduce the charger output when the oven, range, or heat pump cycles on, then increase it later. In homes with multiple EVs, look for load sharing features that let two wallboxes communicate and divide available charging capacity without tripping a breaker. An EV energy management system can be an economical alternative to a service upgrade when used within local code requirements. The tradeoff is complexity: networked features depend on firmware and sometimes cloud services. If connectivity is unreliable, ensure the charger has a safe operating configuration and that any required load management functions continue working without an internet connection.
Plan the Run for Performance and Code Compliance
The wire path matters as much as the breaker size. Longer runs increase voltage drop and can reduce charging efficiency, so keep the charger as close to the panel as practical or increase conductor size on very long routes according to your electrician’s recommendation. Garages often favor EMT conduit mounted on the surface for durability, while finished basements might call for a neatly routed path through joist bays. Use listed fittings and avoid sharp bends that make pulling conductors difficult. Label the disconnect or breaker clearly, bond metal conduit where required, and confirm all equipment is listed for the environment. Little details like antioxidant compound on aluminum lugs when specified by the manufacturer, correctly sized bushings, and strain relief at the entry points help the installation last.
Before work begins, pull the required permit and align the plan with manufacturer instructions and local amendments to the National Electrical Code. After inspection, keep a simple care routine: test the GFCI according to manufacturer instructions, inspect the connector for dirt or damage, and store the cord on its holster so it does not kink. Check the wallbox for firmware updates that improve charging profiles or add utility integrations. If you add a second EV or a large appliance later, revisit the charger’s maximum current setting and schedule so the installation you planned today continues to match tomorrow’s load.